
Getting Started
We are excited you chose to begin your crypto journey with KIRA! This page will help get you up and running with KIRA and the Ethereum network as quickly as possible! Click the blue chat bubble icon at the bottom right to ask KIRA any questions you may have.

WARNING: Cryptocurrency is a volatile and risky asset class. As a general rule, never put in more than what you are willing to lose. It is very common for even the most popular cryptocurrencies to dip in price as much as 98%. Purchase responsibly!
1. COINBASE
The first thing you will need is an account at a cryptocurrency exchange that allows you to purchase cryptocurrency using your debit/credit card, bank, or even wire transfer. The most trusted and widely used service is Coinbase.com.
How to create a Coinbase account: YouTube
Coinbase is like a digital bank for cryptocurrencies. It's a platform where you can easily buy, sell, and store various types of digital currencies like Bitcoin, Ethereum, and many others. Think of it as like the TD Ameritrade or Robinhood (stock trading platforms) of the crypto universe.
Coinbase has been vigilant with legal compliance in the United States, so you will need to provide them with ID to verify your identity.
It may take a few days for them to approve your account. Once you have your account setup and ready, don’t worry about doing anything just yet. There are a few other important steps we need to cover first!

2. METAMASK
Now that you have a way to purchase cryptocurrency with Coinbase, we need a safe and secure way to store our cryptocurrency. For this, we will use MetaMask.io.
MetaMask is what we call a “wallet”. Much like a wallet in the real world, it’s where we store all our cryptocurrency, but with some cool advanced features thrown in! It is by far the most popular, trusted, and commonly used application for Ethereum. It's available as a Chrome browser plugin and as a mobile app, making it convenient and accessible. We recommend using the Chrome browser plugin.
During the MetaMask account creation process, you will reach a very important step where you are given a string of random words that act as your “keys” or “seed words”. These keys / seed words are used to access your cryptocurrency on the blockchain. Think of it as like a password the Ethereum network has generated just for you and your account.
Never give anyone your keys / seed words. Store your keys / seed words safely. Have you heard those stories about individuals who purchased Bitcoin when it was remarkably inexpensive, but something goes horribly wrong, and they could have been millionaires? What happened? They lost their keys / seed words. If you lose your keys / seed words, you lose everything. It sounds scary, but crypto was invented to give you control over your life and finances. With more control comes more responsibility.
That said, don’t worry! Step 3 is an optional but highly recommended step to securing your keys / seed words in a bulletproof way, quite literally!

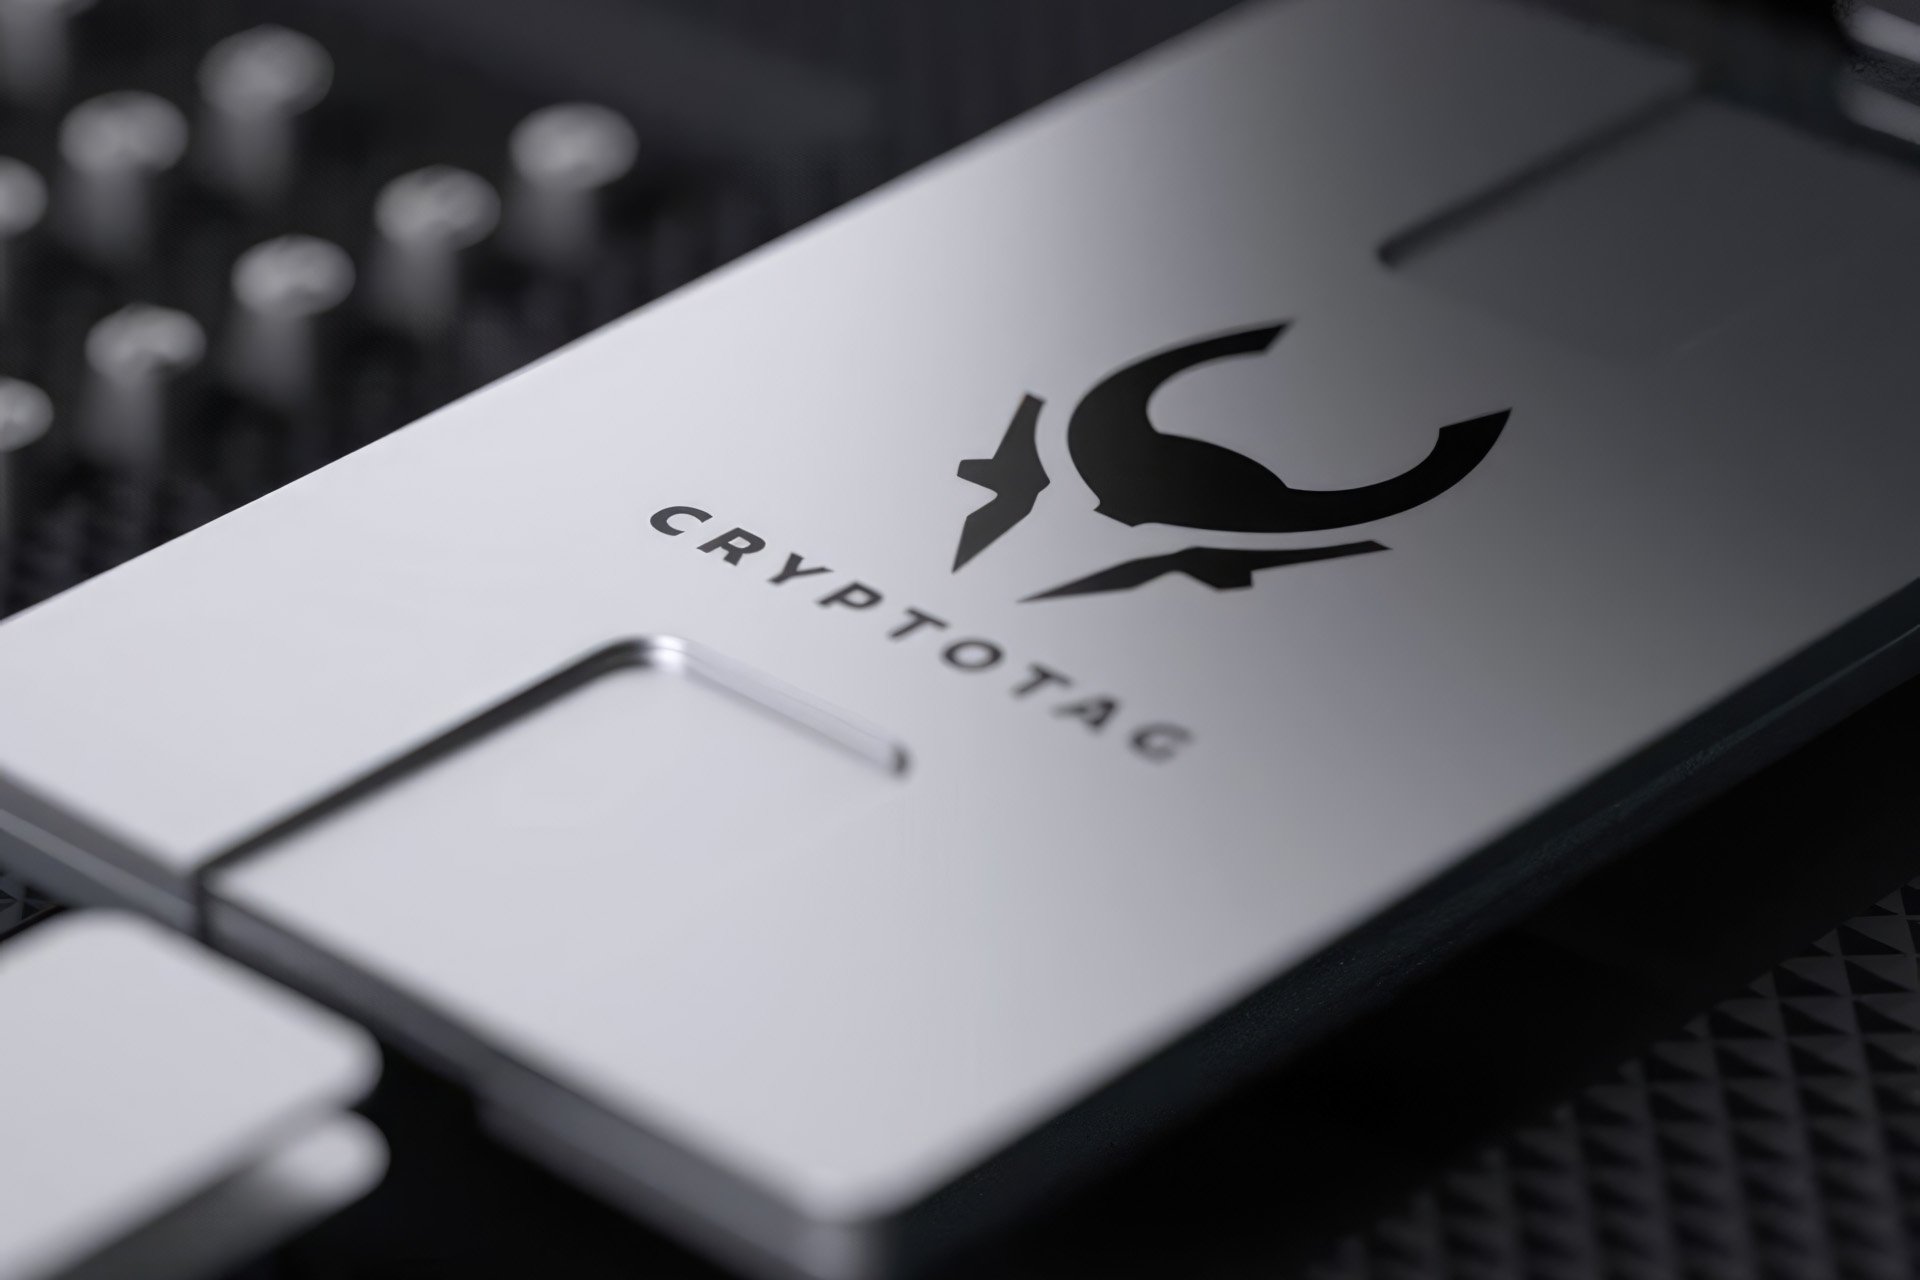
3. CRYPTOTAG
Storing your keys / seed words is extremely important. You can write your words down on a piece of paper if you want, but what happens if there is a house fire?
We highly recommend Titanium reinforced cold storage. They are fireproof, waterproof, and bulletproof. Your keys / seed words will be incredibly safe, removing numerous points of failure.
We recommend using the Zeus Starter Kit from Cryptotag.io. While it can be somewhat of an investment at around $120 dollars, if you are serious about crypto, it’s well worth it.
DO NOT store your keys / seed words online, or on a piece of paper, or keep your coins on an exchange.
We don’t get anything for promoting them. We just believe proper keys / seed storage is very important!
4. ETH AND USDC
Now we need to get some ETH and USDC into our shiny new MetaMask.io wallet. How exciting! But first, we need to teach you some very basic things about how Ethereum works. This is where things get a little technical, but you’ll get it!
ETH: The Ethereum network has its own primary coin associated with it called “Ether” or ETH. Whenever you transact on Ethereum, you must pay a fee for that transaction. This fee is paid for in ETH. The crypto community simply calls it a “gas fee”. Like a car, in order to get things in motion, you need gas. Having ETH in your MetaMask is required to interact with Ethereum. In the real world, gas prices are always fluctuating. Sometimes they are high, sometimes they are low. The same applies for Ethereum depending on network congestion. If you are unsure how much ETH you should buy, we recommend $30 - $50 or so for now. This should cover a few transactions if gas prices aren’t too high. (Gas prices right now are very expensive. If you want KIRA, but can’t afford gas prices, you can always participate in our contests on X and win free KIRA that way.)
USDC: (USD Coin) is a cryptocurrency that works like a digital version of the U.S. dollar. When you buy USDC, think of it as transforming your U.S. dollars into cryptocurrency dollars. The crypto community calls it a stablecoin, because its value is designed to stay the same as the U.S. dollar. $1 USDC equals $1 USD. USDC is popular for its reliability, and it is also regularly audited to ensure compliance with legal standards.
First, we will be buying ETH and USDC on Coinbase.
Second, we will send both ETH and USDC to its new home in MetaMask.
Third, we will finally swap our USDC for KIRA.
We will only cover how to buy and send USDC in this example, because buying and sending ETH will be the exact same process.
As for ETH, once you send it to your MetaMask, there is nothing more you will need to do. When we use MetaMask to perform a transaction, it will automatically calculate and pay the ETH gas fee for us.
1. First, we are going to purchase some USDC on CoinBase.
Go to: www.coinbase.com/price/usdc - and on the right side you will see a menu for buying and selling cryptocurrency. Click the ‘Add cash’ shown in the image below, and follow the steps it presents. You will be using this USDC to purchase KIRA in later steps, so purchase however much USDC you intend to put into KIRA.

2. Get your Ethereum address in MetaMask. Your Ethereum address is your own personal address where you store all of your cryptocurrency. It’s a long string of random text that behaves like an address in the real world. You send and receive cryptocurrency to an address. You can locate it in the image below. Click the double box icon next to the address to copy it. Now that we have our address, let’s head back to Coinbase.

3. Go back to: www.coinbase.com/price/usdc and click the “primary balance” tab towards the top, and on the left you will see a section for sending and receiving USDC to another address. We are going to send it to the MetaMask address we just copied.
4. Click the “Send” tab on the right side of the website.
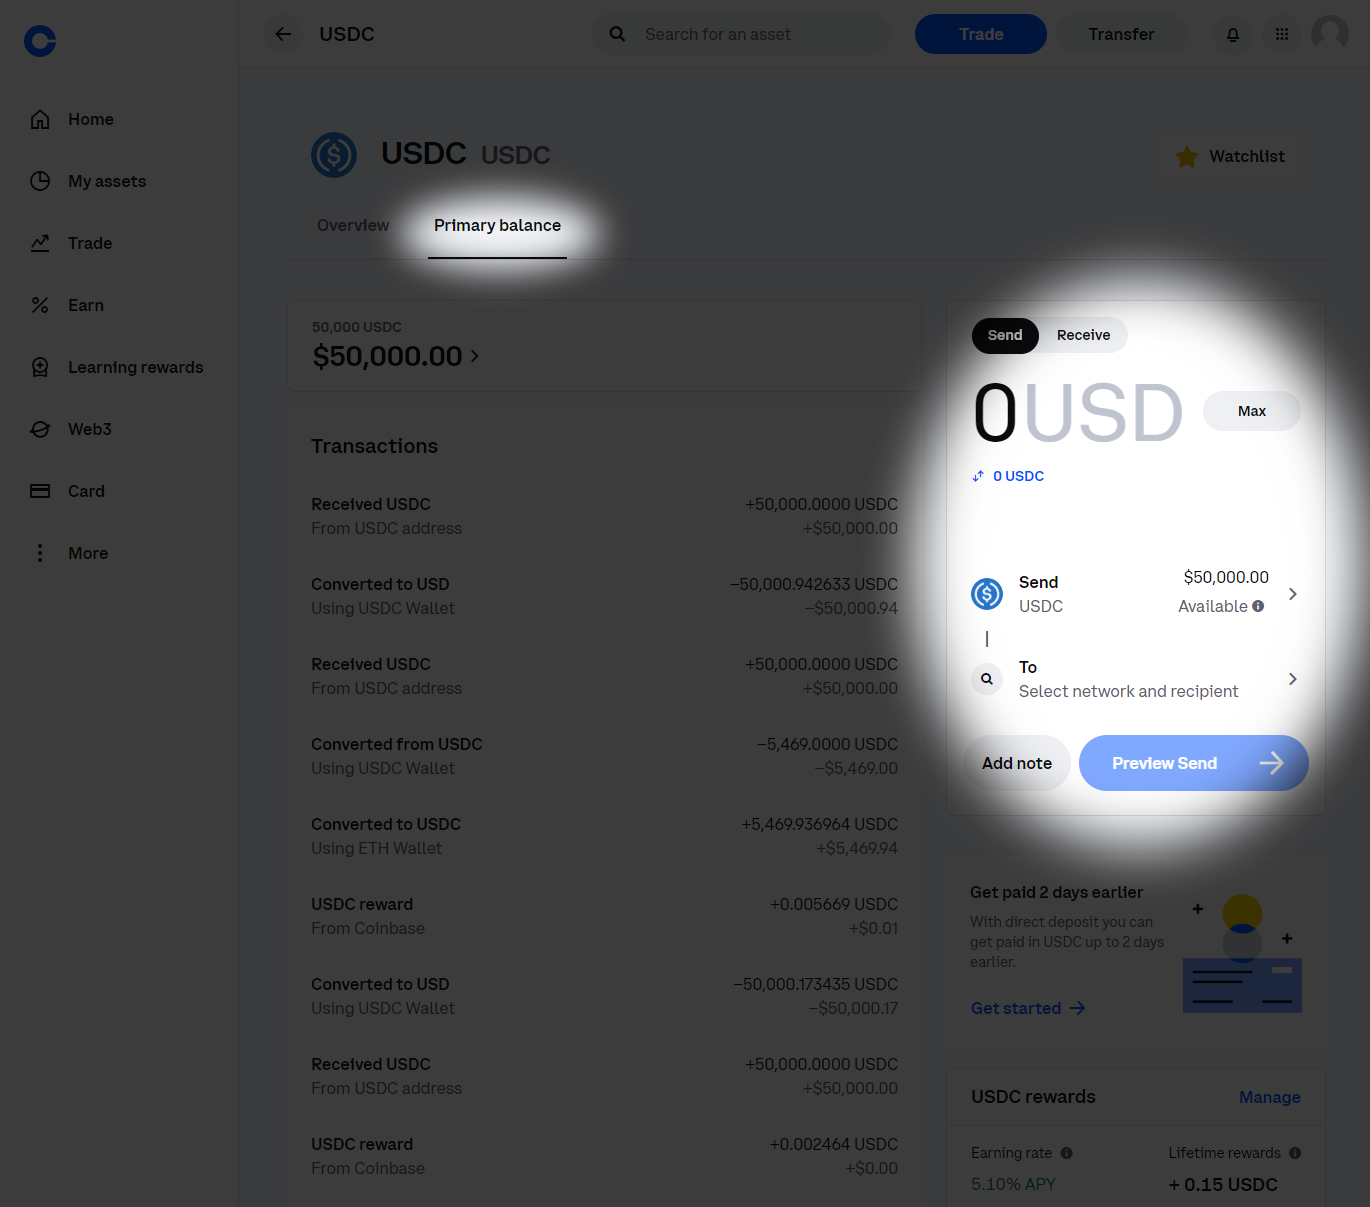
5. Input how much USDC you would like to send.
6. Paste the address you copied from MetaMask into the “To” field.
Note: this step is important. If you send your crypto to the wrong address, you lose that crypto forever. Always make sure you are sending money to the correct address. If you aren’t entirely sure, send a small amount (like $1 dollar) to your MetaMask address and wait for the transaction to appear just to be safe, and then send the rest.
Once you send both your ETH and USDC to your MetaMask wallet, it could take a few moments or minutes depending on Ethereum’s network congestion.
If the USDC is not showing up in your MetaMask wallet, you may need to import it. Towards the bottom of your MetaMask wallet, click “Import tokens”, and do a search for “USDC”. Once you import USDC, it will appear in your token list along with your balance.

Now that we have USDC and ETH in our MetaMask wallet, we can finally swap our USDC for KIRA in the final step!
4. SUSHI
Congrats! You made it this far! Next, we are going to finally swap our USDC for KIRA on Sushi.com.
Sushi is a decentralized exchange, also called a “DEX”. DEXs are like traditional exchanges (like Coinbase), but is without a middleman or central authority controlling and operating them. DEXs are widely considered to be one of Ethereum’s crowning achievements, and we like many others consider DEXs to be a revolutionary technological marvel. They really are that awesome!
You can swap your USDC to KIRA on Sushi.com here:

Thankfully, Sushi is extremely easy to use!
1. Input how much USDC you want to swap for KIRA, and it will give you a live view of how much KIRA you will receive for that transaction.
2. When you figured out how much you want, click swap at the bottom.
3. Clicking swap will automatically launch your MetaMask plugin, where you will need to approve your transaction.
4. MetaMask will likely ask you for a maximum spending limit amount. This is an additional security feature that restricts how much cryptocurrency Sushi is allowed to swap. This is helpful if you have say $50,000 USDC in your wallet, but you only want Sushi to be allowed to swap $5,000 USDC. As a general rule, input just a little over what you intend to swap. Ex: If you are swapping 100 USDC for KIRA, set your spending limit a little higher, to 110 USDC. You can always raise it afterwards when your spending limit has been met.
5. That’s it! You did it! You are now a KIRA holder and owner. To see your KIRA in your MetaMask wallet, you will need to import the token. Open up your MetaMask and click the + Import tokens button at the bottom.

6. Click on “Custom token”.
7. Copy paste this address into “Token contract address”.
0xf98ab0874b13a7fdc39d7295dedd49850a5d426b
8. Click Import. KIRA will now appear in the list of cryptocurrencies that you hold.

Where does the USDC go?
When someone swaps USDC for KIRA on SushiSwap, the USDC goes into a liquidity pool. In decentralized exchanges like Sushi, trading pairs are used, for example, USDC/KIRA. A liquidity pool for this pair contains both USDC and KIRA tokens. When you swap USDC for KIRA, your USDC is added to the pool, and an equivalent value of KIRA (based on current market rates) is removed from the pool and transferred to you. This process is facilitated by smart contracts that automatically manage the exchange rates and transactions based on supply and demand in the pool.
You can always swap KIRA back to USDC whenever you want using Sushi.com. Thus, KIRA is completely decentralized. Pretty cool!

5. WHAT NOW?
Congrats on purchasing KIRA and taking your first steps into cryptocurrency! So what is there to do now?
If you want to track the price of KIRA, use the KIRA/USDC pair tracker on DEX Screener. This is a great tool for monitoring the KIRA price and viewing the chart. On the right panel, you can input how much KIRA you own, and it will automatically convert it to U.S. Dollars for you.
You can win FREE KIRA on our X account. We will have regular contests with all kinds of fun prizes. It’s also worth checking in and keeping up with the latest KIRA news.
Here are some other great resources that we recommend you check out.
Coffeezilla on YouTube - Coffeezilla is a great YouTube investigator who exposes online scams and fraudulent gurus. He combines deep analysis and humor to uncover deceptive practices, educating his audience about crypto fraud.
If you are completely lost and are struggling on any of these steps, try asking our KIRA AI by clicking the chat icon on the lower right corner of the site. If that fails, ask her for our support email, and reach out to us directly.
Remember, your keys / seed words are very important. Make sure you keep them safe, and do not give them to anyone for any reason.
Farewell, and good luck my friend. I leave you now with some sexy saxophone music.
